It all started with a well-intentioned Sunday meal prep marathon. Picture this: trays of marinated chicken, hearty beef stew, and enough chili to feed the entire neighborhood. Proud of my culinary productivity, I turned to my trusty suction vacuum sealer to store everything.
Big mistake.
The minute I hit “seal,” it turned into a kitchen crime scene. Marinade oozed out of the bag like a horror movie. The chili? A splattered mess. I stood there, one hand holding a dripping bag, the other Googling: how does a chamber vacuum sealer work?
Little did I know that a single search would change my meal prep game forever. Ready to upgrade your food storage? Let’s dive into the basics this beginner’s guide will be your new best friend.
Contents
- 1 What Is a Chamber Vacuum Sealer, Exactly?
- 2 So, How Does a Chamber Vacuum Sealer Work?
- 3 Chamber Vacuum Sealer vs Suction Vacuum Sealer: What’s the Difference?
- 4 What Can You Seal with a Chamber Vacuum Sealer?
- 5 Tips for Beginners: Seal Like a Pro
- 6 Is It Worth the Price Tag?
- 7 The Sustainable Side of Chamber Sealers
- 8 How to Care for Your Chamber Vacuum Sealer?
- 9 Trending Uses in 2025: What Everyone’s Sealing Now
- 10 FAQs: Chamber Vacuum Sealing for Curious Beginners
- 11 Expert Thoughts: Ready to Seal Like a Pro?
- 12 About the Author
What Is a Chamber Vacuum Sealer, Exactly?
Now that we’ve set the stage, let’s clarify what this handy device really is. Before we get into the inner workings, let’s define what we’re working with.
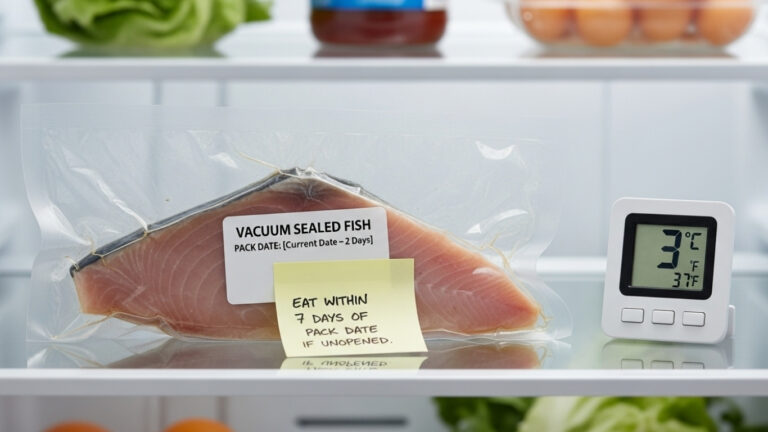
A chamber vacuum sealer is a countertop appliance designed to remove air from vacuum bags by depressurizing the entire chamber, not just the bag itself. This key distinction enables it to perform a task that most suction sealers can’t: seal liquids cleanly and efficiently.
Think of it as the vacuum sealer’s smarter, stronger sibling built not just for solids, but also soups, stews, marinades, and even moist cuts of meat.
So, How Does a Chamber Vacuum Sealer Work?
With a clear understanding of the basics, let’s explore how the machine actually operates.
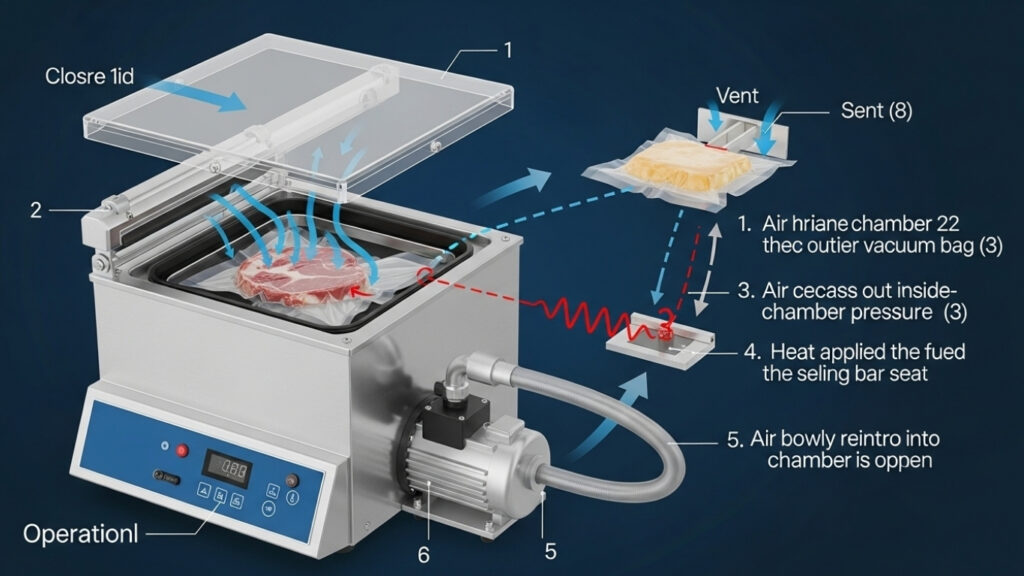
Let’s break down the magic here’s a beginner-friendly walkthrough of how a chamber vacuum sealer works.
1. You Place the Food Bag Inside the Chamber
You start by filling a vacuum-safe bag with your food item anything from grilled veggies to marinated salmon. Then, you lay the open end of the bag across the sealing bar inside the vacuum chamber.
2. Close the Lid to Lock in the Environment
Once you close the lid, the machine creates a completely sealed vacuum environment not just around the bag but in the entire chamber. That’s what makes it special.
3. The Machine Evacuates Air from the Chamber (Not the Bag Alone)
Unlike external sealers that pull air from the bag, a chamber sealer removes air from the whole chamber. This causes the air inside the bag and outside to equalize, which prevents liquids from being sucked out no mess, no chaos.
4. The Bag is Heat-Sealed Inside the Chamber
Once the vacuum cycle completes, the machine heat-seals the bag shut. This airtight seal locks in freshness, flavor, and shelf life.
5. Air is Slowly Reintroduced into the Chamber
As air returns to the chamber, the pressure difference causes the bag to tightly compress around the food. Voilà! You have a perfectly sealed, shelf-stable meal ready for storage, freezing, or sous vide.
Read More: Why Is My Vacuum Spitting Stuff Back Out? 7 Common Causes
Chamber Vacuum Sealer vs Suction Vacuum Sealer: What’s the Difference?
Understanding the process, it’s helpful to compare it with traditional vacuum sealers. Let’s clear up the confusion. Here’s how these two vacuum sealing systems compare:
| Feature | Suction Vacuum Sealer | Chamber Vacuum Sealer |
| Liquid Sealing | ❌ Difficult and messy | ✅ Easy and clean |
| Bag Type | Embossed/textured bags (expensive) | Flat smooth bags (affordable) |
| Bag Cost per Unit | $0.30–$0.75 | $0.05–$0.15 |
| Air Removal Method | From the bag only | From the entire chamber |
| Seal Strength | Moderate | Commercial-grade strong |
| Bulk Prep Suitability | Limited | Excellent |
| Sous Vide Ready | Occasionally | 100% Ideal |
If you seal liquids, cook sous vide, or prep in bulk, a chamber sealer is smart.
What Can You Seal with a Chamber Vacuum Sealer?
More than you think! The versatility of a chamber sealer is what makes it worth the counter space.
Perfect for:
- Soups and stews
- Raw meats in marinade
- Cooked dishes for freezing
- Fresh fruits and veggies
- Soft cheeses and deli meats
- Ground coffee or tea
- Bulk grains and nuts
- Herbs and leafy greens
- Leftovers that would otherwise go bad
In short, if it fits in a bag, you can seal it.
Tips for Beginners: Seal Like a Pro
If you’re starting out, these tips will save you from common mistakes and maximize your success.
1. Don’t Overfill the Bag
Leave at least 1–2 inches of headspace so the seal is clean and secure.
2. Label Before You Seal
Jot down what’s inside and the date before sealing your future self will thank you when dinner isn’t a frozen mystery.
3. Pre-Freeze Liquids
If you’re sealing soups or sauces, consider pre-freezing them in a container for a few hours to avoid spillage.
4. Adjust Pressure for Fragile Foods
Berries, baked goods, and greens benefit from a gentler vacuum level to avoid squishing.
Is It Worth the Price Tag?
With all these benefits, you may wonder if a chamber sealer justifies the investment.
The upfront cost of a chamber vacuum sealer can range from $300 to $800 for home models. Yes, it’s an investment but one that pays off.
Why It’s Worth Every Penny:
- Massive food savings from bulk buying
- Less food waste due to longer shelf life
- Saves freezer space with compact packaging
- Reusable bags in some models = less plastic use
- Professional-level results at home
If you cook regularly, especially in bulk, the savings and convenience add up fast.
The Sustainable Side of Chamber Sealers
If you’re eco-conscious (high five!), a chamber vacuum sealer aligns beautifully with green living.
Here’s how:
- Reduces food waste
- Uses less plastic per seal
- Supports seasonal buying and preserving
- Fewer grocery trips = smaller carbon footprint
- Preserves the freshness of organic or garden-grown produce
You’re not just sealing food you’re embracing a smarter, greener kitchen.
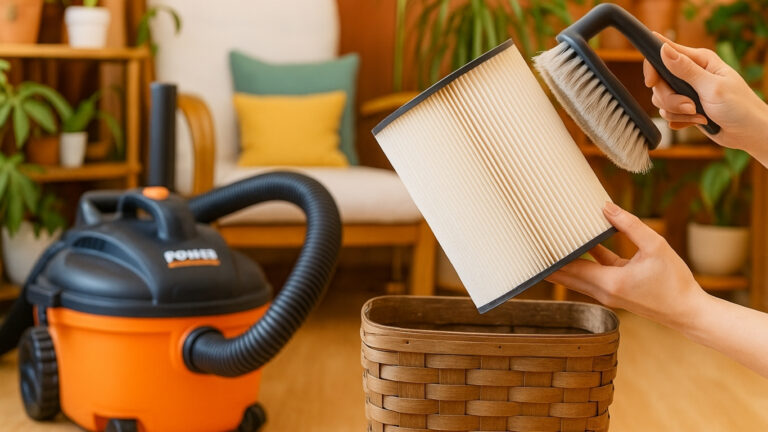
How to Care for Your Chamber Vacuum Sealer?
To ensure longevity and performance, proper care is essential. Here’s how:
Regular Maintenance:
- Wipe down the seal bar and inside chamber after each use.
- If you have an oil pump, change the oil as recommended by the manufacturer.
- Clean the gasket and sealing strip to prevent leaks.
- Store it dry never leave moisture inside the chamber.
With minimal care, these machines can last you 5–10 years or more!
Trending Uses in 2025: What Everyone’s Sealing Now
As you get comfortable with the basics, check out these popular modern uses:
Hot Trends:
- Sous vide steaks and gourmet meals
- Mason jar sealing for dry goods
- Batch prepping smoothie kits
- Sealing homemade broths
- Pet food in portioned bags
- Leftover Wine Sealing (Yes, It Works!)
The chamber vacuum sealer isn’t just functional it’s trendy. And way more satisfying than Tupperware chaos.
Read More: Can You Wash Vacuum Filters? A Complete Guide for Every Model
FAQs: Chamber Vacuum Sealing for Curious Beginners
How does a chamber vacuum sealer work differently from a regular one?
It vacuums air from the whole chamber not just the bag making it perfect for sealing liquids and delicate foods without the mess.
Can I use my regular vacuum sealer bags with it?
Nope. You’ll need flat, smooth vacuum bags, which are actually more affordable and widely available online.
Is it too bulky for small kitchens?
Certain models are compact and designed with home kitchens in mind just be sure to check your counter space before making a purchase.
Can I reuse bags?
Some thicker vacuum bags can be washed and reused if you’re storing dry items. Always follow food safety guidelines.
How often should I clean the machine?
Give it a quick wipe after every use. For heavy use, clean the chamber and seal bar weekly, and change the oil as needed.
Expert Thoughts: Ready to Seal Like a Pro?
You’ve come a long way let’s wrap up with what you’ve learned and what’s next. If you’ve made it this far, you’re no longer a beginner you’re a soon-to-be vacuum-sealing wizard. You now understand how does a chamber vacuum sealer work, why it’s better for liquids, and how it can help you save time, money, and sanity in the kitchen.
Whether you’re prepping meals for the week, diving into sous vide, or just tired of tossing spoiled leftovers, a chamber vacuum sealer is the kitchen upgrade you didn’t know you needed but now won’t want to live without.
So go on, seal the deal your future self (and your freezer) will thank you.