Let me paint you a scene. I’m chopping bell peppers, grooving to Fleetwood Mac, not a care in the world until the knife slips and lands squarely on my fingertip. It’s a tiny cut. Barely a paper slice. But suddenly, I’m bleeding like I just lost a sword fight. If you’ve ever experienced this mini emergency, you know the drill: Panic, paper towel, Google search.
Fingertip cuts are deceptively dramatic. They bleed more than they should and make everyday things texting, typing, and tying shoelaces feel like Olympic events.
That day taught me a valuable lesson: everyone should know how to bandage finger tip to stop bleeding quickly, whether a home cook, woodworker, or proud plant parent.
Let’s break it down from stopping the bleeding to wrapping it up like a pro (no nurse required).
Contents
- 1 1. Why Finger Tips Bleed So Much (and Why You Don’t Need to Freak Out)
- 2 2. Step One: Stop the Bleeding (Without a Mini Meltdown)
- 3 3. Cleaning the Cut (Skip the Myths, Do It Right)
- 4 4. To Ointment or Not to Ointment?
- 5 5. Choose the Right Bandage (Not All Are Created Equal)
- 6 6. How to Bandage Finger Tip to Stop Bleeding Quickly (Step-by-Step)
- 7 7. Keep It Covered (But Let It Breathe Later)
- 8 8. Finger Tip Bandaging Mistakes to Avoid
- 9 9. DIY & Eco-Friendly Bandaging Alternatives
- 10 10. When to Seek Professional Help
- 11 FAQs: Your Finger Tip Bandaging Questions, Answered
- 12 Experts Thoughts: You’re Now a Finger Tip First Aid Pro
- 13 About the Author
1. Why Finger Tips Bleed So Much (and Why You Don’t Need to Freak Out)
Here’s a not-so-fun fact: your fingertips have more nerve endings and blood vessels than most parts of your body. That’s why they’re ultra-sensitive; even a small cut can look like a murder scene.
But don’t worry. Most fingertip cuts are minor and can usually be treated at home with first-aid know-how, a few simple supplies, and a reasonably calm mindset (panicking slightly is normal).
2. Step One: Stop the Bleeding (Without a Mini Meltdown)
Before anything else, apply pressure.
- Use a clean cloth, tissue, or sterile gauze.
- Press down directly on the cut for 5–10 minutes.
- Elevate your hand above your heart to slow the blood flow.
Tip: Stay still during this step. Moving around increases your blood pressure and guess what? More blood.
If bleeding hasn’t slowed after 10–15 minutes of direct pressure, it might be deeper than expected. In that case, consider heading to urgent care.
3. Cleaning the Cut (Skip the Myths, Do It Right)
Once bleeding slows, resist the urge to apply a bandage immediately. First, you need to clean the wound thoroughly but gently.
Here’s how:
- Wash your hands with soap.
- Rinse the cut under cool running water.
- Use mild, fragrance-free soap if needed.
- Lightly dry the area with a fresh towel or sterile piece of gauze, being careful not to rub.
Avoid alcohol or hydrogen peroxide they’re too harsh and can damage tissue. Mild soap and warm water are all you need to get the job done.
Read More: How to Wash Ace Bandage the Right Way: Step-by-Step Guide
4. To Ointment or Not to Ointment?
This step is optional but helpful.
Spread a small amount of antibiotic ointment (such as Neosporin or Bacitracin) over the cut to help ward off infection. If you prefer a natural option, look for:
- Calendula cream
- Aloe vera gel
- Manuka honey-based salves
These plant-based remedies are soothing and align with the eco-friendly first-aid trend bonus points for sustainability!
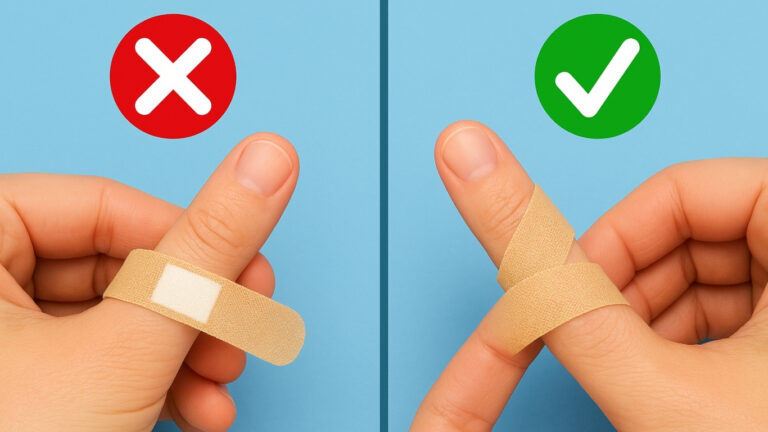
5. Choose the Right Bandage (Not All Are Created Equal)
Now comes the part where most people mess up: slapping on a regular bandage and hoping for the best. Not so fast.
Best Bandage Types for Finger Tips:
- Fingertip-shaped bandages: Contoured to wrap around the curve of the tip.
- Flexible fabric bandages: Great for movement-heavy hands.
- Waterproof adhesive wraps: Perfect for washing dishes, bathing, or doing yard work.
Informational product tip: You can find fingertip bandages in most first-aid kits or buy them separately on Amazon. Look for “butterfly” or “T-shaped” designs they stay on the way better than the usual strips.
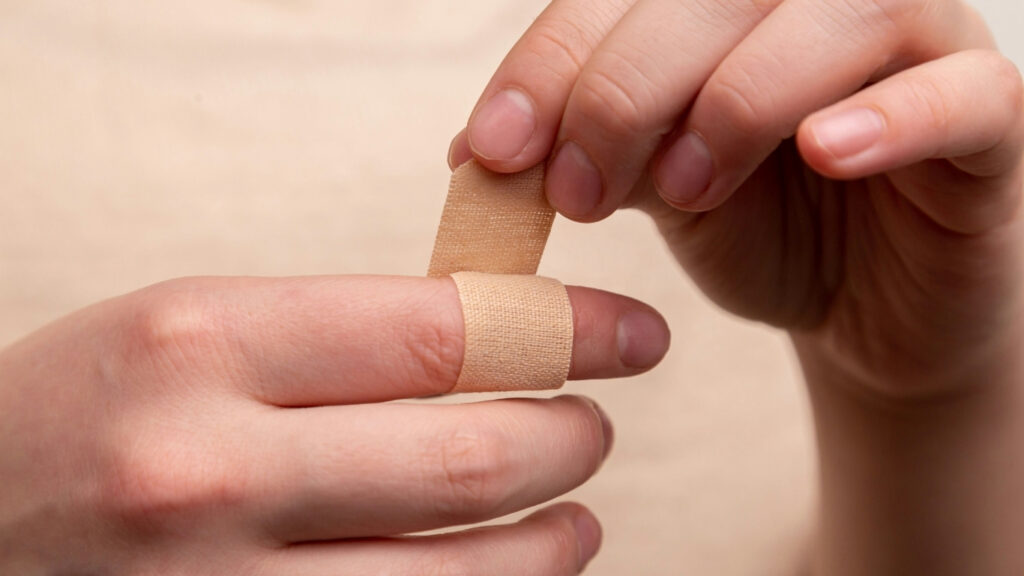
6. How to Bandage Finger Tip to Stop Bleeding Quickly (Step-by-Step)
Let’s get into the actual wrapping part.
Step-by-Step Method:
- Make sure the cut and surrounding skin are completely dry.
- If using ointment, apply a small amount not too much, or it’ll slide off.
- Center the absorbent pad of the bandage on the cut.
- Wrap the adhesive wings around the fingertip securely.
- Press edges firmly so they stick well.
If using regular adhesive strips, cross two strips in an X-shape over the tip. It’s not fancy, but it works in a pinch.
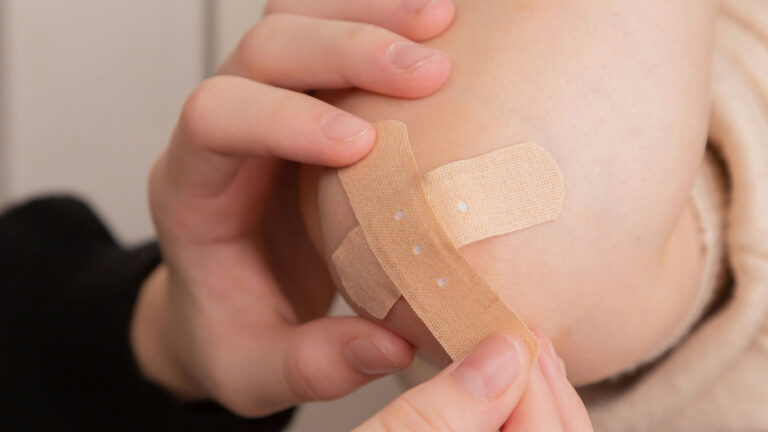
7. Keep It Covered (But Let It Breathe Later)
At first, keep the cut covered at all times, especially during the first 24–48 hours, when the infection risk is highest.
After that:
- If the cut is healing and not leaking, you can let it air out during safe, clean activities.
- Replace the bandage at least once daily or whenever it gets wet or dirty.
Bandage rotation = happy healing.
8. Finger Tip Bandaging Mistakes to Avoid
Even the best intentions can go wrong if you’re not careful. Here’s what NOT to do:
- Don’t wrap it too tight your finger shouldn’t throb or turn purple
- Don’t use duct tape (yes, some people do this)
- Don’t skip cleaning, even for minor nicks
- Don’t leave the same bandage on for more than 24 hours
9. DIY & Eco-Friendly Bandaging Alternatives
Going green with your first-aid kit? There are surprisingly practical (and stylish!) options for the sustainability-minded:
- Reusable fabric bandages – washable and breathable
- Compostable bamboo band-aids – biodegradable and latex-free
- Natural healing salves – safer for sensitive skin and the planet
Sustainable doesn’t mean less effective it just means your bandaging game helps Mother Earth, too.
10. When to Seek Professional Help
Most fingertip cuts are DIY-safe, but keep an eye out for signs that scream “doctor time”:
- Deep or jagged wounds
- Uncontrollable bleeding after 15 minutes
- Visible dirt or rust you can’t remove
- Redness, swelling, pus, or fever
- It’s been 10+ years since your last tetanus shot
When in doubt, have a nurse or doctor take a peek. Better safe than sorry.
Read More: How to Remove a Bandage Stuck to Wound: No Pain, No Damage
FAQs: Your Finger Tip Bandaging Questions, Answered
1. How long does it take a fingertip cut to stop bleeding?
Usually within 5 to 10 minutes with steady pressure. If it doesn’t stop after 15, get it checked.
2. Can I use super glue to seal the cut?
There are medical-grade skin adhesives, but don’t grab craft glue! Use a bandage unless you’ve got a proper wound glue in your kit.
3. Can I keep working with a bandaged finger?
Yes, make sure it’s secure and waterproof if needed. Avoid dirty tasks without gloves.
4. Do I need to change the bandage every day?
Yes. Replace it daily or often if it gets wet, dirty, or peels off.
5. Is it okay to sleep with a bandage on?
Absolutely. It’s smart during the first 48 hours. Just make sure it doesn’t cut off circulation.
Experts Thoughts: You’re Now a Finger Tip First Aid Pro
So next time your finger gets on the wrong side of a kitchen knife, box cutter, or rogue staple, take a breath—you’ve got this. You now know how to bandage your finger tips to stop bleeding quickly with confidence, style, and maybe even a little humour.
Keep your first-aid kit stocked and your bandage game strong, and remember: every scar has a story (but a well-treated cut doesn’t have to leave one).