It starts with a yowl, a limp, or the classic exaggerated paw flick that every cat parent knows means something is not right. Maybe your cat took a misstep on the balcony, had a not-so-friendly encounter with the hedges, or went a few rounds with a rogue Lego. Whatever the case, you’re here because you need to know how to bandage a cat’s paw safely, swiftly, and with your hands still intact.
First: deep breath. You’re not alone. Bandaging a feline’s foot might sound like trying to gift-wrap a tornado, but with a bit of prep, the right supplies, and some treat-based bribery, it’s doable. Let’s walk (or hobble) through it together.
Contents
- 1 Step 1: Assemble Your Paw Protection Kit
- 2 Step 2: Calm Before the Storm
- 3 Step 3: Inspect and Clean the Paw
- 4 Step 4: Place the Gauze Pad
- 5 Step 5: Wrap With Care
- 6 Step 6: Lock It In Place
- 7 Step 7: Add a Sock or Bootie (Optional but Adorable)
- 8 Step 8: Monitor Like a Hawk
- 9 Step 9: Know When to Call the Vet
- 10 Step 10: Treats, Praise, and Peace
- 11 FAQs: How to Bandage a Cat’s Paw
- 12 Experts Thoughts
- 13 About the Author
Step 1: Assemble Your Paw Protection Kit
Before you reach for your cat, have everything ready. Cats have a sixth sense of your intentions, so once they realize you’re on a mission, they will vanish. Avoid mid-wrapping supply runs by gathering:
- Sterile, non-stick gauze pads (3×3″ or smaller)
- Self-adhering vet wrap (breathable and flexible)
- Cat-safe antiseptic spray (chlorhexidine-based or vet-approved)
- Medical tape (hypoallergenic, fur-friendly)
- Soft towel (for burrito-ing a squirmy feline)
- Treats or lickable paste (your new best friend)
- Optional: baby sock or cat bootie
Sustainability tip: Look for vet wrap and antiseptics with biodegradable packaging or reusable options.
Step 2: Calm Before the Storm
This isn’t just about your cat. You need to be calm, too. Whisper, move slowly, and don’t rush. If your cat is feisty or frightened, wrap them gently in a towel, leaving only the injured paw exposed. This is the feline burrito method: secure, swaddled, and slightly ridiculous.
Play calming music, use Feliway spray, or offer a calming chew 30 minutes prior. Prevention is the best cure for chaos.
Step 3: Inspect and Clean the Paw
Moisten a clean cloth and carefully remove any dirt or debris. Be on the lookout for:
- Splinters or glass
- Cuts, swelling, or redness
- Bleeding or discharge
Spray the wound with a cat-safe antiseptic. Avoid alcohol or hydrogen peroxide these sting and delay healing. Dab gently with gauze to dry.
If bleeding is heavy or does not stop within 10 minutes, skip the wrap and take your pet to the veterinarian.
Step 4: Place the Gauze Pad
Cut your sterile gauze to fit the wound it should cover the injured area completely without hanging off the paw. This layer prevents sticking and protects from infection.
Gently press it into place, ensuring it stays centered as you reach for the wrap.
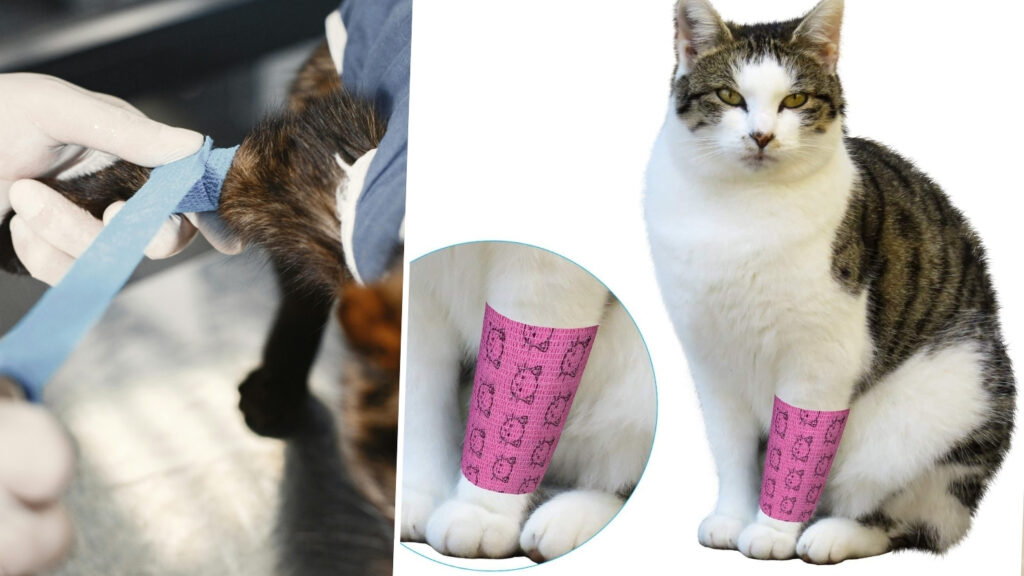
Step 5: Wrap With Care
Use the self-adhesive wrap to secure the gauze in place. Start just below the paw pad, overlapping each layer by about half the width of the wrap.
Key rules:
- Wrap snugly, but not tight enough to restrict blood flow
- Leave toes visible so you can monitor for swelling
- Stop above the ankle joint (no full-leg mummification, please)
Visual Suggestion: A diagram showing correct wrap layering on a cat’s paw.
Step 6: Lock It In Place
Once you’ve finished wrapping, secure the end with a small piece of medical tape. Never tape directly to fur.
Test the wrap: it should stay in place if Fluffy walks but comes off easily when gently tugged.
Read More: How Long Does It Take for Cat Dewormer to Work?
Step 7: Add a Sock or Bootie (Optional but Adorable)
Slide a baby sock or cat bootie over the wrapped paw and tape it loosely around the upper leg. This helps prevent licking and keeps the bandage cleaner for a more extended period.
It also turns your cat into a fashion icon.
Step 8: Monitor Like a Hawk
Check the bandaged paw 2–3 times daily for:
- Swelling or cold toes
- Limping or refusal to walk
- Licking or biting the bandage
- Smell or moisture
Change the bandage every 24 hours or as soon as it becomes wet, soiled, or loose.
Step 9: Know When to Call the Vet
Bandaging is a temporary fix, not a substitute for professional care. Call your vet if:
- The wound doesn’t start to heal in 2–3 days
- There’s pus, odor, or increased swelling
- Your cat keeps limping or hiding
- The bandage keeps slipping or cutting off circulation
Step 10: Treats, Praise, and Peace
You made it! Your cat is bandaged, you’re only slightly scratched, and the crisis is averted. Now it’s time for recovery: cozy blankets, quiet time, and lots of treats.
Reward your kitty for cooperating (or trying to) and reinforce positive behavior. After all, she might need another wrap job someday, and you want her to somewhat trust you.
Read More: Is Fresh Step Cat Litter Good? Honest Review from a Cat Owner
FAQs: How to Bandage a Cat’s Paw
1. Can I use regular Band-Aids on my cat?
No, human bandages don’t allow the skin to breathe, and the sticky adhesive can irritate or damage your cat’s fur and skin. It’s best to use wraps and gauze that are specifically designed for their intended purpose.
2. How long should the bandage stay on?
Only 24-48 hours unless instructed otherwise by your vet. Monitor closely and change it daily.
3. What if my cat keeps pulling off the bandage?
Use a recovery cone or employ distraction methods, such as puzzle toys or high-reward treats. Booties can help, too.
4. Can I bandage a paw preemptively?
No. Wrapping an uninjured paw can cause discomfort, restrict movement, or lead to circulation issues. Only bandage when necessary.
5. What if I’m unable to determine the severity of the injury?
When in doubt, consult your vet. Paws are sensitive and can get infected quickly if not treated properly.
Experts Thoughts
Now you know precisely how to bandage a cat’s paw without panicking, over-wrapping, or ending up on your cat’s permanent grudge list. The process is part first-aid, part trust exercise, and part performance art but you did it. Your kitty’s on the mend, and you’re officially a paw-wrapping pro.
Still, feeling unsure? Bookmark this post. Because while cats might have nine lives, you only have two hands and we’re here to keep both scratch-free.