How to get blades out of a pencil sharpener – yeah, I didn’t think I’d need to Google that until disaster struck mid-sketch. There I was, totally in the zone, when suddenly, my colored pencil snapped. No big deal, right? I grabbed my favorite sharpener, twisted it, and nothing. Just a sad, squeaky grind. Upon inspection, I realized the blade was jammed tighter than a pickle jar lid on arm day.
That moment of frustration launched a full-blown mission: to safely remove blades from a pencil sharpener at home without risking a tetanus shot or an emergency room visit.
If you’ve been there curious artist, crafty parent, DIY enthusiast, or someone trying to unclog a glitter-glued sharpener this guide is about to be your new best friend. We’re breaking it down step by step with simple, safe tips. You’ll wonder why you didn’t do it sooner.
Contents
- 1 Why Remove the Blade in the First Place?
- 1.1 Know Your Sharpener Type First
- 1.2 Tools You’ll Need to Remove Sharpener Blades Safely
- 1.3 Step-by-Step: How to Get Blades Out of a Pencil Sharpener
- 1.4 Bonus: Reuse That Blade in a DIY Project
- 1.5 Common Problems (and What to Do About Them)
- 1.6 When You Shouldn’t Remove the Blade
- 1.7 A Word on Safety and Responsibility
- 1.8 FAQs: How to Get Blades Out of a Pencil Sharpener
- 1.9 Expert Thoughts: From Frustrated Artist to Blade-Removing Pro
- 1.10 About the Author
Why Remove the Blade in the First Place?
Why bother taking the blade out? Isn’t it easier to toss it and buy another? Well, here are a few compelling reasons:
- The blade is jammed with broken pencil bits, eraser crumbs, or the occasional Lego dust.
- It’s rusted, dull, or damaged and affecting performance.
- You want to clean the sharpener thoroughly, especially if you share it with kids or students.
- Crafting purposes – DIYers reuse blades for detailed projects like carving, paper scoring, or mini modeling tools.
- Sustainability matters reusing and repairing is a win for your wallet and the planet.
Whatever your reason, knowing how to get blades out of a pencil sharpener means fewer headaches and more sharp, snappy pencils in your future.
Know Your Sharpener Type First
Before we proceed with the step-by-step guide, it’s essential to know what kind of sharpener you’re using. Trust me, the method matters.
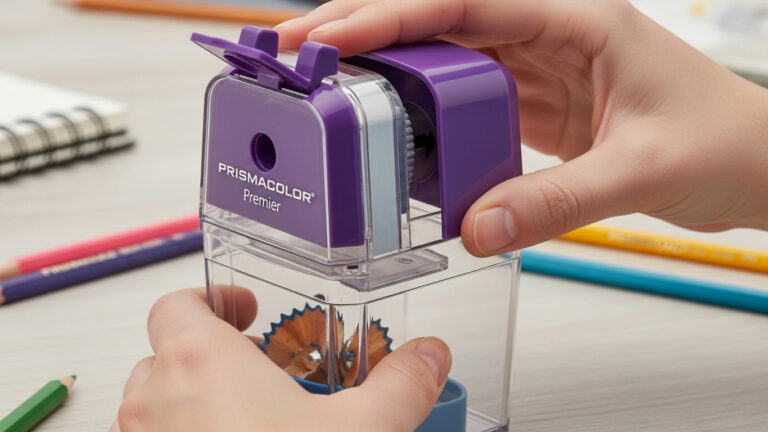
1. Basic Manual Sharpener
These are your classic, single-hole, handheld sharpeners often plastic or metal. They usually have one visible screw holding the blade in place, and the process for these is the easiest.
2. Crank-Handle or Desktop Sharpener
Ah, the retro vibe! These are mounted on desks and have a handle you turn. They’re a little more complex but still manageable.
3. Electric Sharpener
Proceed with caution. Electric sharpeners contain small internal motors and wiring. Always unplug first, and don’t attempt to disassemble unless you’re comfortable working with electronics.
Understanding your tool is half the battle. Let’s move on to what you’ll need.
Tools You’ll Need to Remove Sharpener Blades Safely
You don’t need a workshop just a few everyday items:
Supplies List:
- Small screwdriver (flathead or Phillips, depending on your sharpener)
- Needle-nose pliers (optional, for grip or pulling)
- Tweezers (for grabbing tiny screws or shavings)
- Gloves (safety first especially if the blade is rusted)
- Rubbing alcohol (for cleaning, if you plan to reuse)
- Soft cloth or paper towel (to work over and catch pieces)
Pro Tip: Work on a light-colored surface, like a tray or towel, to prevent the loss of tiny screws.
Read More: How to Sharpen a Pencil Sharpener Blade: Step-by-Step Guide
Step-by-Step: How to Get Blades Out of a Pencil Sharpener
Ready to channel your inner tool ninja? Follow these steps carefully to remove the blade safely.
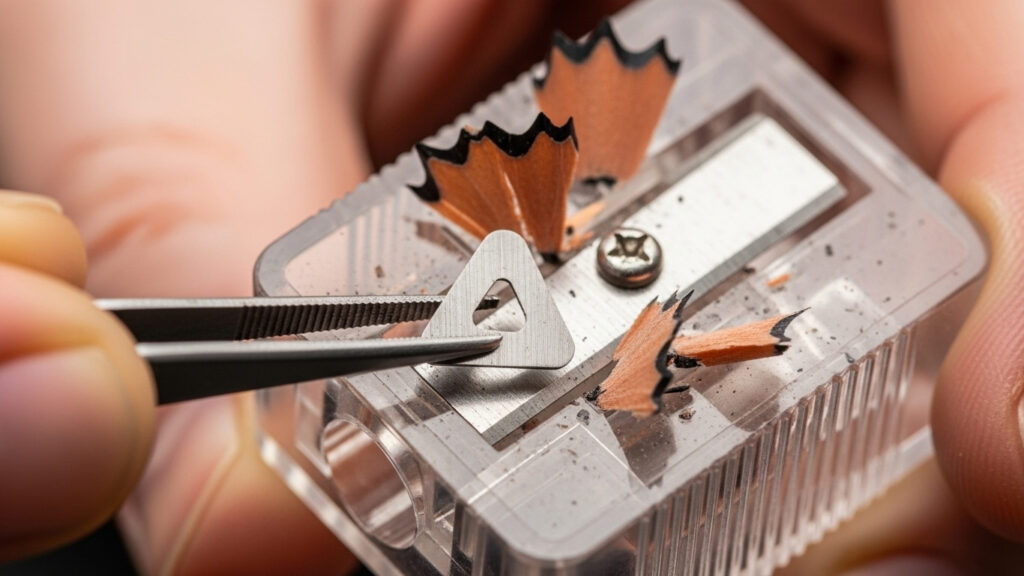
Step 1: Assess the Screw and Blade
Flip your sharpener over and locate the screw. In basic sharpeners, it’s usually right in the blade’s center. For more complex types, look for housing coverage first.
- Identify the screw type (flat or cross)
- Check for damage or rust if it’s worn down, you may need to soak it or use a rubber band trick (we’ll get to that later)
Step 2: Unscrew the Blade Gently
Here’s where we begin the extraction mission:
- Hold the sharpener steady (use gloves or a towel if needed)
- Insert your screwdriver snugly into the screw head
- Rotate slowly counter-clockwise
- Apply steady pressure but don’t force it or you’ll strip the screw
Once the screw loosens, the blade will usually lift easily. If it feels stuck, gently lift it with tweezers or a flathead screwdriver from the edge without touching the blade’s edge directly.
Safety Check: The blade is still sharp. Avoid touching the edge with bare fingers, even if it “looks dull.”
Step 3: Clean the Blade (Optional but Recommended)
Once the blade is out, you’ve got options:
- Gently wipe away graphite residue and debris using a soft cloth dampened with rubbing alcohol.
- Dry it thoroughly to avoid future rust
- Store it safely in a paper envelope or a small container, labeled and away from little hands
If you’re disposing of the blade, wrap it in thick tape or drop it into a container for sharp objects (a clean pill bottle works too).
Bonus: Reuse That Blade in a DIY Project
We’re big fans of sustainability around here. If you’re wondering what to do with a removed blade besides tossing it, here are some crafty ideas:
- Mini craft knife for paper cutting (mounted safely, of course)
- Woodworking detail tool for small-scale modeling or carving
- Recycled art project the blade can add industrial flair to steampunk or found-object art
- Jewelry making some crafters have even turned old blades into upcycled statement pieces!
The possibilities are sharp (pun intended).
Common Problems (and What to Do About Them)
Let’s troubleshoot a few common hiccups when learning how to get blades out of a pencil sharpener:
The Screw Won’t Budge
- Place a rubber band between the screw and your screwdriver to improve grip and prevent slipping.
- Use a drop of white vinegar or WD-40 and let it sit for 5–10 minutes
- Use a hairdryer on a low setting to gently warm the plastic casing and help loosen it.
The Blade Is Stuck
- Pry gently from the side with tweezers
- Try twisting the casing gently do not force it
- Let it soak in warm, soapy water, then dry completely
When You Shouldn’t Remove the Blade
There are times when attempting to remove the blade isn’t worth it:
- Electric sharpener with sealed casing? Leave it to the pros or replace it.
- The blade is completely rusted or warped? Toss it.
- The screw is stripped beyond saving? Time to upgrade.
- The sharpener is a dollar-store brand? Sometimes, it’s more sustainable to recycle and buy better.
A Word on Safety and Responsibility
Let’s not forget: blades are sharp, small, and potentially dangerous. Whether you’re handling this at home with kids around or teaching students how to maintain their art tools, safety is priority #1.
Here are your golden rules:
- Always unplug electric sharpeners before disassembly
- Store the blades in labeled containers
- Don’t leave tools unattended around kids or pets
- Wash your hands after handling old sharpeners, especially if they’re rusty
Taking 5 extra minutes for safety might save you a trip to the doctor or the vet!
Read More: Who Made the Pencil Sharpener? The Surprising Inventor Behind It
FAQs: How to Get Blades Out of a Pencil Sharpener
1. Can I remove the blade from a plastic sharpener safely?
Yes! Most plastic sharpeners are designed with one screw. Use a small screwdriver, take time, and wear gloves if needed.
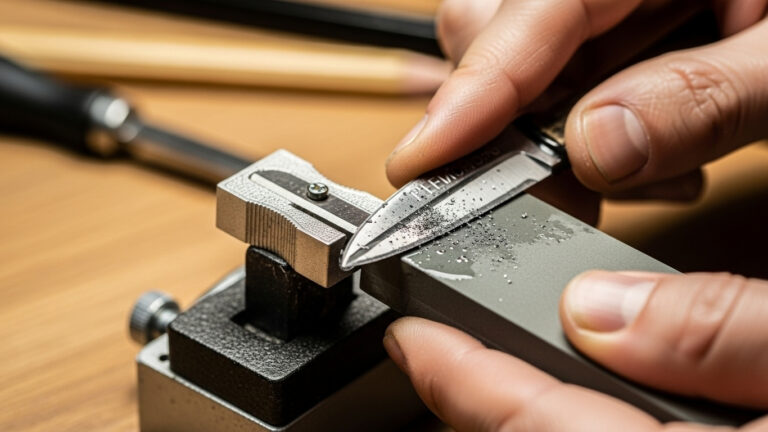
2. How do I clean a dull or rusty sharpener blade?
Remove the blade and clean with rubbing alcohol. If it’s rusty, gently rub with fine sandpaper. If it’s too far gone, replace it.
3. Is it safe to use the blade for crafts?
Many crafters reuse blades for delicate paper or woodwork. Just ensure they’re mounted securely and used responsibly.
4. Can I get the blade out of an electric sharpener?
Only if you’re comfortable with small electronics, unplug it, open the casing, and proceed carefully. If unsure, consult the manufacturer.
5. What’s the best way to dispose of a used blade?
Wrap it in masking tape or drop it in a rigid container before tossing. Never leave loose blades in household trash!
Expert Thoughts: From Frustrated Artist to Blade-Removing Pro
Let’s be honest before today, figuring out how to get blades out of a pencil sharpener probably wasn’t on your bucket list. But now that you’ve got the steps, tools, and know-how, you’re also sharpening your pencils and your DIY skills.
Whether you’re fixing a stuck blade, cleaning an old tool, or breathing new life into a tired sharpener, doing it yourself feels pretty empowering, doesn’t it?
So, go ahead rescue that stubborn sharpener from the junk drawer. And maybe, just maybe, turn that blade into your next masterpiece tool.