There’s a particular shelf in every home. You know the one tucked just out of reach, holding your seasonal mugs, that elusive mixing bowl, or your stash of secret snacks. You stretch, tiptoe, and maybe even attempt a clumsy counter climb (don’t worry, we’ve all done it). But there’s a more innovative, safer way a step stool.
And not just any step stool one you make yourself using basic tools and a dash of DIY magic.
Think of it as the gateway project into your woodworking era: affordable, beginner-friendly, renter-safe, and customizable to your space and style.
Let’s break it down with how to make a step stool plan from scratch, with soul.
Contents
- 1 Why DIY a Step Stool?
- 2 What You’ll Need: Tools for Beginners
- 3 Materials List: Small Build, Big Impact
- 4 Step 1: Measure and Mark
- 5 Step 2: Saw to Size
- 6 Step 3: Sand for Smoothness
- 7 Step 4: Assemble Dry
- 8 Step 5: Glue + Screw
- 9 Step 6: Finishing Touches
- 10 Sustainable Style Tips
- 11 Creative Uses Beyond Stepping
- 12 FAQs: How to Make a Step Stool Plans
- 13 Expert Thoughts: Your DIY Legacy Starts Here
- 14 About the Author
Why DIY a Step Stool?
Skip the Store, Build with Heart
You could click “Buy Now” and wait for a cookie-cutter stool. But here’s why DIY wins:
- Budget-Friendly: No need to splurge basic pine or reclaimed wood works wonders.
- Custom Fit: Tailor your space and style’s height, width, and finish.
- Eco-Friendly: Reuse old wood or offcuts to keep waste low and creativity high.
- Satisfying: There’s something powerful about building furniture with your own two hands.
With a little effort, your stool will not only hold your weight but also carry your flair.
What You’ll Need: Tools for Beginners
Start Simple – This Isn’t a Woodshop Class
Part of what makes making a step stool plan great is its low barrier to entry. You don’t need power saws or fancy joinery tools just the basics.
Essential Tools:
- Hand saw (a crosscut saw is perfect)
- Screwdriver (manual or power drill)
- Sandpaper (120 & 220 grit)
- Wood glue
- Clamps (optional but helpful)
- Pencil and measuring tape
- Square or ruler (for right angles)
If you’ve assembled IKEA furniture, you’ve already got what it takes.
Materials List: Small Build, Big Impact
Wood, Screws & Style
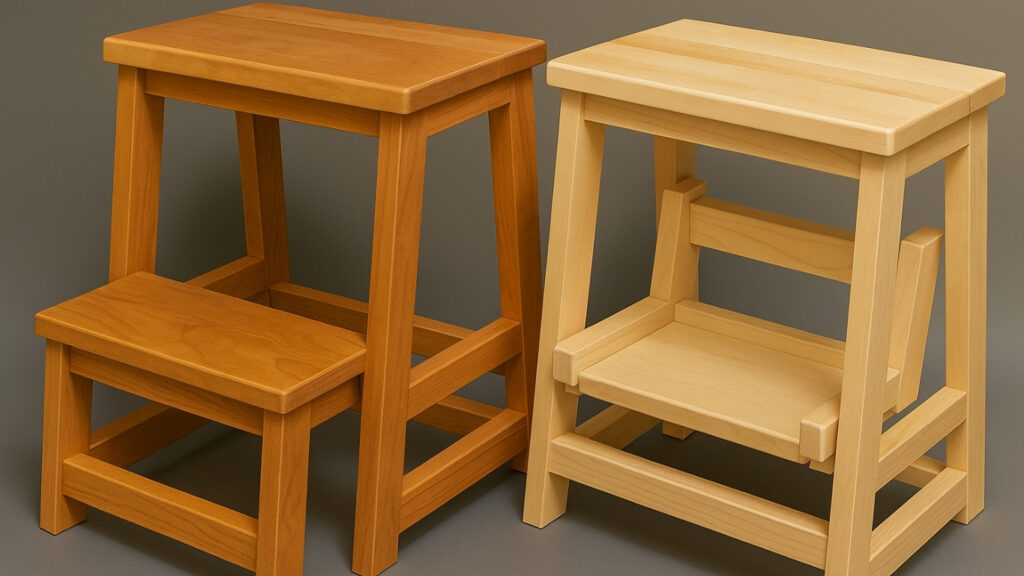
For this basic plan, we’re building a two-step stool ideal for kitchens, closets, or anywhere you need a little lift.
Recommended Materials:
- (1) 1×10 board (8 feet long) – for steps and sides
- (2) 1×2 boards – for internal support cleats
- Wood screws (1.25″ to 1.5″)
- Wood glue
- Non-toxic finish, stain, or paint
- Felt pads (optional for floor protection)
Sustainable Tip: Check your local lumber yard or reuse scrap wood from past projects. Sustainability starts with what you already have.
Step 1: Measure and Mark
Get Precise – Your Structure Depends on It
Dimensions to cut:
- Top Step: 16” W x 8” D
- Bottom Step: 16″ W x 6″ D
- Side Panels: 14″ H x 8″ D (trapezoidal for a slight tilt)
Grab your tape measure and pencil to mark each cut with precision. Use a square to keep your lines at a crisp 90 degrees because crooked cuts aren’t our style!
Step 2: Saw to Size
Dust Off That Hand Saw
Cut slowly and carefully along your marked lines. If using a hand saw, let the blade do the work don’t rush.
If you’ve never sawed wood before, practice on a scrap piece first to get a feel for the motion and control.
Read More: How to Make a Stepping Stool: Perfect for Kids and Adults
Step 3: Sand for Smoothness
Because Splinters Aren’t Stylish
Begin by sanding with 120-grit paper to gently smooth out any rough edges and sharp corners. Then, switch to 220-grit to give your project the smooth, polished finish it deserves.
Tip: Round off corners slightly for safety especially if kids or pets will be nearby.
Sanding isn’t glamorous but transforms your build from “garage scrap” to “intentional furniture.”
Step 4: Assemble Dry
Do a Test Run – No Glue Yet!
Before you reach for the screws or glue, dry-fit all your pieces together. This is your chance to spot uneven cuts or misalignments before things get permanent.
Make sure the steps sit level and flush with the side panels.
Step 5: Glue + Screw
Time to Lock It All In
Apply wood glue to each joint, clamp the pieces together (or weigh them down), and then drive in your wood screws.
Assembly Order:
- Attach support cleats under each step.
- Screw steps into the cleats from the top.
- Attach side panels to steps and base.
Catch any sneaky glue squeeze-out with a damp cloth while it’s still wet because dried drips are no one’s DIY dream.
Step 6: Finishing Touches
Paint It, Stain It, Flaunt It
Now for the fun part customization! Here’s how to make your step stool look like it came out of a boutique shop:
- Natural Look: Apply linseed oil or beeswax for an organic, rustic finish.
- Modern Vibe: Try matte black legs and a stained wood top.
- Kid-Friendly: Use bright, non-toxic paint and add names or stencils.
Add felt pads underneath to prevent scratching floors and reduce noise.
Sustainable Style Tips
DIY That’s Earth-Friendly
While building your stool, make it a mission to stay sustainable:
- Reuse offcuts from old projects
- Avoid toxic stains or finishes
- Choose FSC-certified wood when possible
- Donate leftover materials or store for future use
Bonus: Mention your eco-efforts when you show off your stool it’s a great conversation starter!
Creative Uses Beyond Stepping
More Than Just a Mini Ladder
Once you master how to make a step stool plan, don’t stop at one. These little structures are surprisingly versatile:
- Nightstand for tight spaces
- Plant stand by a sunny window
- Mini bookshelf for kids’ books
- Laptop stand or side table
- Bathroom steps for toddlers
Add a coat of water-resistant sealer, which can even be used on a porch or patio.
Read More: How to Make a Wood Step Stool in Under an Hour
FAQs: How to Make a Step Stool Plans
1. Can I make this step stool with pallet wood?
Absolutely! Just be sure to sand thoroughly and check for hidden nails. Pallet wood adds rustic charm and major sustainability points.
2. Is this step stool safe for kids to use?
Yes, but use non-toxic finishes, round the corners, and double-check that the stool is stable and securely assembled.
3. What if I don’t have a saw?
Many home improvement stores will cut boards to size if you bring your measurements. You can also try precut boards from craft supply stores.
4. Can I paint the stool with leftover wall paint?
Technically, yes, but for best results (and safety), use wood-safe paint or non-toxic acrylic especially for high-touch areas.
5. How much weight can this stool hold?
When appropriately built with quality wood and strong joints, your stool can easily hold 200–300 pounds. If needed, reinforce with extra cleats.
Expert Thoughts: Your DIY Legacy Starts Here
Whether you’re a seasoned DIYer or picking up a saw for the first time, building your step stool is a win on every front: it’s affordable, functional, sustainable, and oh-so-satisfying.
Now that you’ve followed along with how to make step stool plans, you’re not just a homeowner or renter you’re a maker. A builder. A budget-savvy creative force of nature.
So take a bow, then step onto your new stool to grab that box of cereal like the home hero you are.