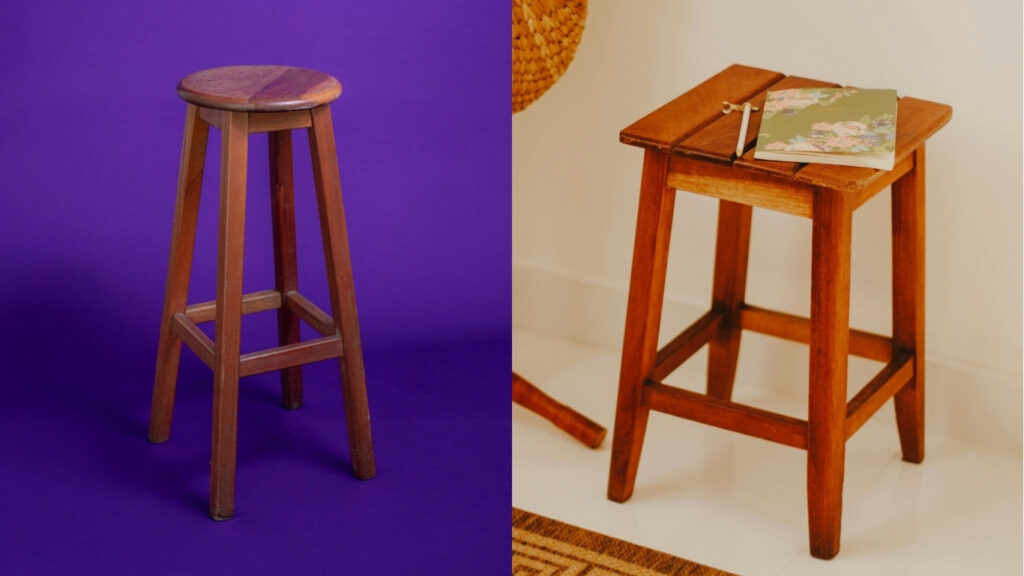
We’ve all been there. You’re reaching for the top shelf the one that holds the fancy wine glasses, holiday platters, or the good snacks and suddenly, you realize you’re not quite as tall as you thought. Balancing on a wobbly dining chair seems like a bad idea (because it is), and stacking books is a certified ankle disaster. What you need is a solid, stylish, and reliable step stool.
But not just any stool.
We’re talking about one that you can build yourself in under an hour for under $20, with a weekend playlist in the background and your favourite drink within reach. Whether you’re a seasoned DIYer or someone who once assembled an IKEA shelf and called it a day, this guide on how to make a wood step stool is your new best friend.
Let’s turn a humble piece of wood into a functional decor gem.
Contents
- 1 Why Make Your Wood Step Stool?
- 2 Materials You’ll Need (Beginner-Friendly)
- 3 Wood & Supplies
- 4 How to Make a Wood Step Stool (In Under an Hour!)
- 5 Step 1 – Measure and Cut Your Wood
- 6 Step 2 – Cut and Sand
- 7 Step 3 – Pre-Drill & Glue
- 8 Step 4 – Final Sanding and Smoothing
- 9 Step 5 – Finishing Touches
- 10 Make It Renter-Friendly
- 11 5 Quick FAQs – All About DIY Step Stools
- 12 Final Thoughts: Your New Favorite Project
- 13 About the Author
Why Make Your Wood Step Stool?
1. It’s Cheaper Than You Think
Most wooden stools on the market range in price from $40 to $100. But DIYing one? It’s often under $20 in materials and you get bragging rights.
2. It’s Customizable
Want it to match your farmhouse kitchen? Paint it white and distress the edges. Need a kid-safe version? Go for rounded corners and a food-safe finish. Making it yourself means making it yours.
3. It’s Sustainable
Use reclaimed wood, bamboo, or off-cuts. Avoid plastics, shipping packaging, and mass manufacturing. DIY is often the most environmentally friendly option, especially when you’re intentional about the materials you use.
Materials You’ll Need (Beginner-Friendly)
Wood & Supplies
- 1″ x 12″ pine board (cut to 36″ length)
- 1″ x 2″ furring strip (for optional supports)
- Wood glue (Titebond III or any eco-friendly option)
- Wood screws (1¼” to 1½”)
- Sandpaper (120 & 220 grit)
- Wood finish or paint (low-VOC, child-safe recommended)
Tools
- Saw (circular or hand saw)
- Drill and bits
- Measuring tape
- Clamps
- Screwdriver
- Safety goggles (don’t skip this step!)
Tip: Reclaimed pallet wood or bamboo boards can make this project both greener and more unique.
Read More: How to Make a Stepping Stool: Perfect for Kids and Adults
How to Make a Wood Step Stool (In Under an Hour!)
Here’s your step-by-step plan. Each stage takes 10–15 minutes at most, especially if your tools are ready to use.
Step 1 – Measure and Cut Your Wood
Basic Cut List:
- Top step: 18″ long x 9″ wide
- Bottom step: 15″ long x 9″ wide
- Four side legs: 12″ tall (cut with optional 10° angled feet)
- Support rails (optional): 12″ each
Measure and mark your boards carefully with a pencil before cutting. If angled cuts seem tricky, go with straight legs instead they’re simpler to build and just as strong.
Step 2 – Cut and Sand
Cut your wood using your saw of choice. If you’re using a circular saw, clamp your board down first for safety. Hand saws work just as well just give yourself a few extra minutes.
Once cut, use 120-grit sandpaper to remove splinters and rough spots. Follow up with 220-grit for a buttery-smooth finish.
Step 3 – Pre-Drill & Glue
Pre-drilling is your best friend here. It prevents wood splitting and makes assembly easier.
- Run a thin line of wood glue along the edges where the step boards will meet the legs, ensuring a secure and long-lasting bond during assembly.
- Clamp the pieces together temporarily.
- Create pilot holes by drilling through the legs and into the bottom of the steps.
- Drive screws in securely.
For extra stability, attach the 1″ x 2″ support rails underneath the steps using the same method.
Step 4 – Final Sanding and Smoothing
Now that it’s assembled, run your hand over every edge. Feel anything sharp? Time to sand it again.
- Round out any harsh corners if kids will be using the stool.
- Smooth all surfaces to prep for painting or sealing.
Sanding not only improves the look but makes the stool safer and more comfortable.
Step 5 – Finishing Touches
Finishing Options:
- Natural Look: Use tung oil or mineral oil for a rustic, earthy feel.
- Painted: Chalk paint adds character. Seal with water-based polyurethane for durability.
- Stained: Use a low-VOC wood stain and a matte sealant.
Allow your finish to dry according to the product instructions (usually a few hours), and voilà you now have a gorgeous, handmade stool.
Sustainable Note: Choose finishes that are non-toxic and safe for indoor air quality. Brands like AFM Safecoat or Vermont Natural Coatings are worth checking out.
Make It Renter-Friendly
If you live in a rental and fear floor scratches or noise complaints from downstairs neighbours, this tip is gold:
- Add felt pads or rubber grips under the legs.
- You can also apply a layer of cork sheet, cut to size, for added anti-slip and sound insulation.
Read More: How to Style a Round Coffee Table: Expert Tips to Nail the Look
5 Quick FAQs – All About DIY Step Stools
1. Is this a good project for beginners?
Absolutely. It’s one of the best starter woodworking projects, teaching the basics of measuring, cutting, and assembly.
2. Can I skip the support rails?
You can, especially if the stool is for light-duty use. But rails do help with long-term durability and weight support.
3. How long does the whole project take?
About 45–60 minutes, not including dry time for finishes. With a pre-cut wood kit, it can be as fast as 30 minutes.
4. What type of wood should I avoid?
Avoid treated lumber or any wood with visible knots that could weaken over time. Stick with clear pine, birch, or bamboo.
5. Can I make this into a plant stand instead?
Totally! With a coat of bright paint or sealant, it doubles as a chic mini display stand for plants, books, or baskets.
Final Thoughts: Your New Favorite Project
You started this post curious about how to make a wood step stool, and now? You’re practically a mini-carpenter. In under an hour, you’ve crafted a piece of furniture that’s useful, beautiful, and infused with personal style.
Whether it lives in your kitchen, bathroom, kid’s room, or next to your favourite bookshelf, it’s more than just a stool. It’s proof that you can turn a few planks into a powerhouse.
So go ahead show it off, step on up, and feel the DIY pride. You’ve earned it.